
← Back to the Homeowner Resource Library
Tile grout and finishes
Choosing Grout for Your Tile
By Advanced Custom Renovations
Grout changes how tile looks, but color is only part of the decision. The right product also needs to suit the tile, the joint, and the location. Choose the look you want, then confirm the installation and care requirements before purchasing.
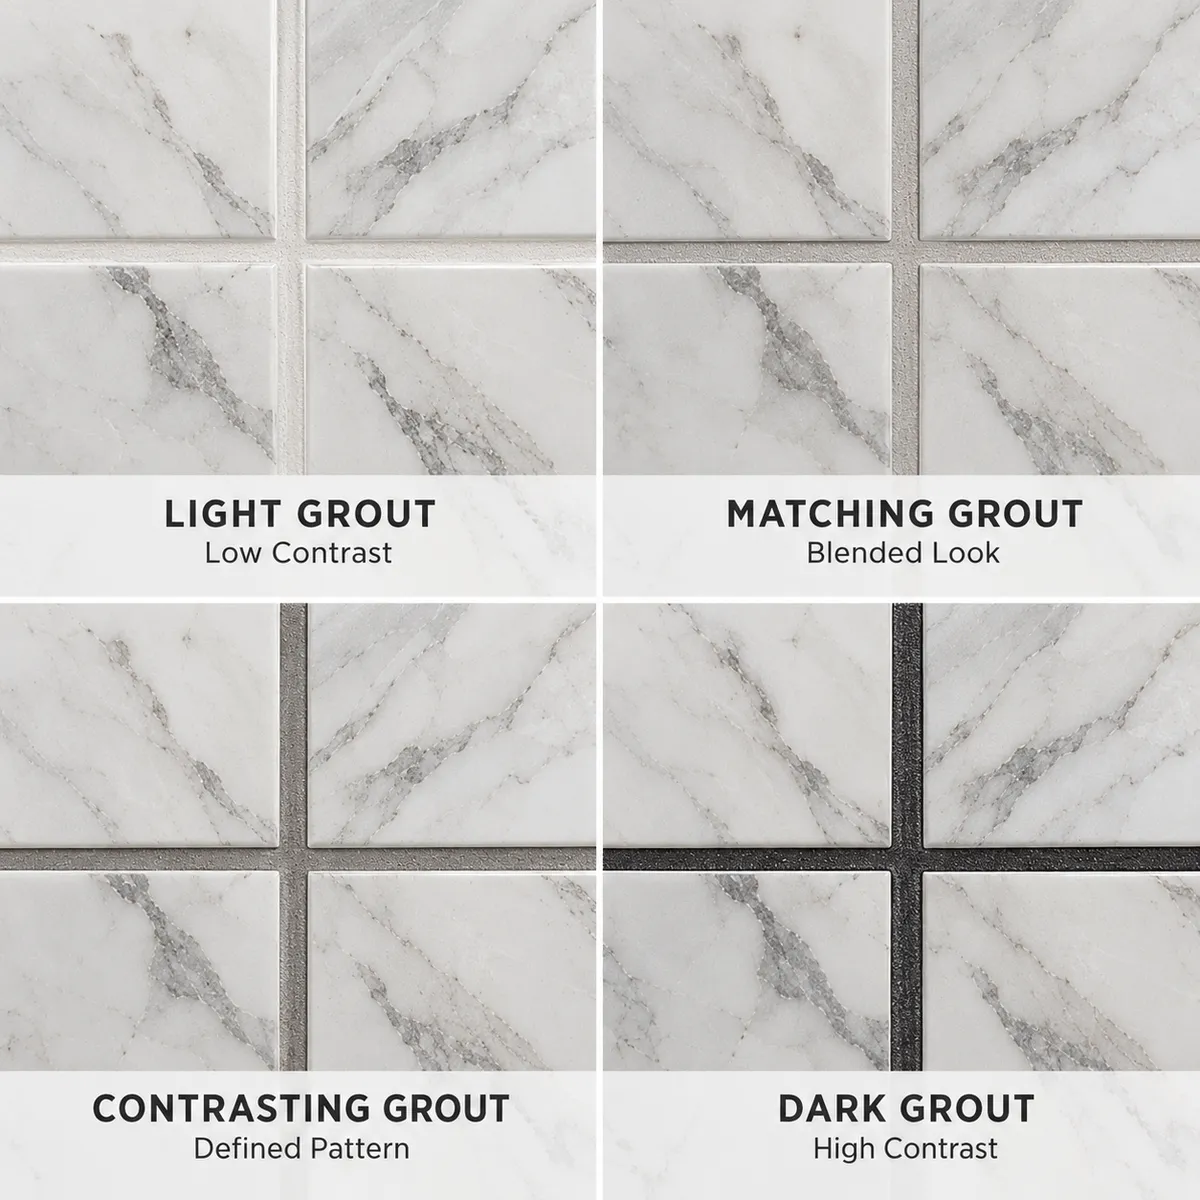
Look at the color beside the actual tile
A close color match tends to soften the grid of joints. A contrasting color makes individual tiles and the layout more noticeable. Neither choice is automatically better; think about whether you want the surface or the pattern to lead.
Compare physical samples with your tile in the room where it will be installed. Screens and printed charts are useful starting points, but lighting and surrounding materials change how a color reads. For a combination you are unsure about, ask whether a small sample board would be worthwhile. Grout color can also vary from a printed reference once installed and cured.
Confirm a joint width the tile can support
A narrow joint may be part of the look you have in mind, but it must work with the actual tile and installation. Tile size variation, edge shape, surface characteristics, and manufacturer requirements all matter. Handmade and intentionally irregular tiles need different expectations from tightly calibrated tile.
Discuss the joint before committing to a layout. Ask how the selected tile will look across a larger area and how its edges affect the appearance of the joint. Grout spacing is an installation decision with a visual result, so it belongs in both conversations.
Ask about the specific grout product
Cement-based, epoxy, and ready-to-use grouts are different product families with different instructions and limitations. A product suitable for one tile or location may not be suitable for another. Confirm compatibility with the tile surface, joint dimensions, and intended exposure.
Ask what maintenance the proposed product needs. Some grouts call for a compatible sealer; others do not. For example, LATICRETE states that its epoxy grouts do not require sealing. Follow the instructions for the exact product installed rather than a rule you heard about grout in general. Keep its name and color with your project records.
Know what grout does and what it does not do
Grout fills the joints between tiles. The shower waterproofing assembly is a separate part of the construction. Applying sealer to grout does not turn a leaking shower into a sound waterproof assembly.
Corners and other movement locations may require an appropriate flexible sealant or another specified movement detail. They should not be treated as ordinary grout joints simply to make every joint look identical. Ask how those locations will be finished.
Plan for normal care
No grout choice eliminates cleaning. Soap residue, tracked-in soil, and mineral deposits can change the appearance of a surface. A discolored patch needs assessment and appropriate cleaning before anyone assumes the grout has failed.
Follow the installed products’ care instructions and address recurring moisture, cracks, or open joints promptly. Our tile and grout care guide explains the habits that help keep the finished space looking its best.
Choose the color with your tile, confirm the product with your installation team, and keep the care information. Those three steps make the selection more useful long after the samples are put away.
